

Installing guitar strap locks is not difficult, yet it can prevent a disaster!
How to install strap locks for the guitar? There is a simple 6 Step Process for installing strap locks for a guitar that works every time. This includes;
- Initial Preparation
- Determine Strap lock position
- Drill Mounting Hole
- Screw the Button
- Attach the Locks
- Insert Lock into Buttons
Let me walk you through these simple steps to installing strap locks and strap buttons onto your guitar…
1. Initial Preparation
Firstly, what do you need to prepare before installation?
So in this step, we need to collect all the tools for the job and the desired strap button which we want to install.
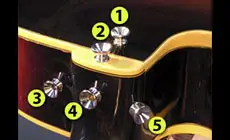
Which Strap Button is BEST?
There are many types of strap buttons to choose from. Some of which is a personal preference. The most common strap locks are the “traditional” strap locks (see image below..) as these look most aesthetically pleasing. Which is fine if your guitar is a collectible.
However, if you are gigging and moving around a lot I would always recommend purchasing something a bit more advance like the “gripper” as this holds the guitar strap much more firmly than the traditional strap locks.
Tools Include:
Besides a strap, buttons, and locks the tools you need to install strap buttons will include a Drill, Drill Bit, Chuck Key, Screwdriver, Pencil, Masking Tape, Solid Surface, and a Towel.
- The Type of Drill? Standard drill
- The Type of Drill Bit? Self Tapping Screw with Phillips Head 1mm (the hole you drill always needs to be smaller than the diameter of the screw)
- Chuck Key? – the chuck key is for assmebling the drill bit to the drill
- The Type of Screwdriver? Phillips/Pozi drive 1.5mm
- The Type of Pencil for marking the guitar? Standard graphite writing pencils work fine however I would recommend the ForestChoice Carpenter pencil
- The Type of masking tape? Standard masking tape will work fine
- The Type of Solid Surface? workbench is ideal however a kitchen side or armchair work well as they hold the guitar is a good position
- The Type of Towel? the towel is to place between the guitar and your solid surface. So anything you don’t mind getting dust on. but, not dirty that it spoils your guitar
Now, we have ALL the Tools and purchased the Strap Button we can look at mounting the strap button onto the guitar.
2. Determine the Strap Lock Position
Before, the main task of mounting the Strap locks we first and foremost, need to decide where to install the strap locks and strap buttons.
You can either do it on the heel located where the neck joins the body and or on the bottom of the body.
To note: you would usually refer to the heel location as the Strap pin and the Lower body location as the End Pin. However, both locations will use the same type of Strap button.
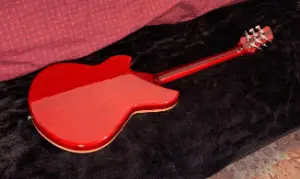
Strap Pin Locations:
As discussed the Strap pin is located on the Neck heel. A common position for installation is highlighted in the image below… When choosing your position you will need to consider locating the Strap Pin where the screw can grip the wood without poking through the other end of the heel. If higher frets are where you usually play, and you think it may obstruct your handling then consider placing the strap button on the back edge of the heel.
Endpin Location:
If you want to install your strap button at the endpin, ensure that your drilling location is placed correctly because you do not want it to be uncentered and unsecured.
It is also important to note that on some acoustic guitars, the jack socket is part of Endpin and so you will need an “Endpin Jack” if you are looking to replace a broken endpin.
3. Drill Hole / Remove old Strap Lock
Before drilling the hole we will need to find a stable surface to place your guitar on.
It would be best if you can towel-cover or blanket-cover it so that there will be no external damage to the guitar’s finish.
Initial Prep For Drilling the Hole
Now your guitar is firmly placed you can easily observe where you want the strap lock to be mounted.
Once you have made up your mind on the location you will use a small strip of masking tape and place it over the location where you wish to drill and then use a pencil to mark the location.
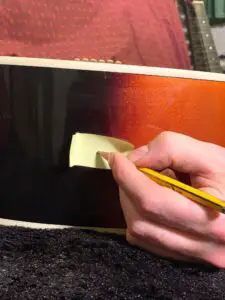
The tape will protect the surrounding area of your guitar.
Removing the Old Strap Lock
If you are just replacing an old strap lock then at this stage is the time to remove the old one. You will need to remove the existing strap button from the guitar by turning the screwdriver anti-clockwise. Carefully remove the screw that holds the strap buttons on your guitar’s base. You are most likely to encounter a rubber or a protective washer placed between the guitar’s body and the button. Don’t just get rid of it, set it aside for further use when you need it to mount the strap button.
Perform the Drilling
With our location marked out, we can now assemble our hand tools by placing the 1mm drill bit into the drill using the Chuck Key.
Please Note: the drill bit diameter needs to be smaller than the screw which holds the strap lock to the guitar.
If you have never used hand tools before then you will need to practice on some old wood before you proceed any further. Please use with care! Holding the drill firm and pointing straight. By which you only pull the trigger softly once the drill bit is firmly against the wood (no sooner!). Pull then trigger gently and keep practicing until you have become 100% comfortable with operating such tools.
Always make sure the guitar is firmly placed and will not move when you apply the pressure of the drill. Remember to be careful and don’t rush your drilling. If you are careless you may harm yourself, or even worse the drill may slip and damage your guitar.
How deep do I drill?
You can easily determine the proper depth by comparing your guitar strap button screw and drill bit side by side. They are usually an estimated 1 inch deep. If you are not sure then you can be precise by marking on the drill bit by folding masking tape 1 inch away from the drilling end of the drill bit. Using tape as your depth indicator is a good idea. The tape serves as the mark at which you should stop drilling. Make sure to do it carefully and at a stable speed, or else you will end up slipping the drill.
4. Mounting The Button
Once the hole has been drilled you then want to mount the button.
Use a Screw Driver to mount the button
A tip here is to use a screwdriver and avoid using a power tool.
You will have more control over a screwdriver and it will help prevent stripping screws or nicking and slipping your guitar. This is important because stripping can cause damage to the finish of your guitar and in some cases, it may damage the sound quality.
Screw the Button
Talking about the protective washer, your current kit may also come with it, so remember to check it out, and if not, you can easily find one at a local store.
Place the new button and the protective washer into the hole in your guitar. The next step is to drive the screw through the button carefully and tighten (by turning the screw clockwise) until it cannot spin anymore.
Note that hand tightening is recommended, as it is easier to feel any sense of overtightening, preventing your guitar from slipping. You want to be mindful that you do NOT overtighten because this will weaken the component and could result in splitting the guitar wood.
5. Attach Strap onto the Strap Buttons
You have now come to the very last step, which is to insert the locks into the buttons. Pull the ball located on the tip of the lock’s barrel to active the locking mechanism. As long as you hold the ball, the locking mechanism will be open.
Now slide the outer side of the strap lock onto the strap button and stop pulling the ball to release the mechanism. Tug the lock to make sure it has latched firmly on the strap button. Once again, repeat this on the remaining strap lock, and you will finish the installation process.
It’s all done now, but do not forget to check the locks and screw frequently and re-tighten the screw if necessary.
Conclusion
You will never want to drop your guitar on the floor, since doing so would probably leave you with a damaged one. So what are the measures to be taken to prevent this disastrous situation? The most practical and economical answer here is to install strap locks and strap buttons onto your beloved guitar. And now, let us walk you through these four steps to install strap locks!
Now that you have read through all the steps, we hope our guide to installing strap locks onto your guitar will be useful to you. If you dont feel like doing it by yourself, please refer to a professional or a local guitar store to do it for you at a reasonable price.