
Did you know the natural oil on your fingers reduces the life expectancy of your guitar strings? This is important to understand as it affects the maintenance process of your guitar!
How to restring an Acoustic guitar? The step by step process for restringing your guitar includes:
- Step 1: Loosen the strings
- Step 2: Remove the bridge pins
- Step 3: Clean the guitar
- Step 4: Install the new strings
- Step 5: Insert the end of the strings into the hole and re-attach the pins
- Step 6: Reeve the strings through the tuning posts and stretch them
- Step 7: Tighten the strings
- Step 8: Snip off any excess string
In this article, we will go over each step in detail so let jump right in!
1. When Do You Need To Restring
Before finding out about the way to renew the guitar strings, you need to know and determine the moment when they need to be replaced. Except for unavoidable circumstances such as broken or damaged strings, it is recommended that you should change your guitar strings every 2 weeks if you play the guitar regularly, otherwise the ideal frequency for the replacement is once a month.
However, very few people can do this because the combined fee of changing the strings will be very high, which will cost you too much. As a result, if you can not change the strings regularly, you should often “listen” to your guitar, thereby finding out even the smallest changes on the guitar when the strings are too old.
Before your guitar strings get too bad, you should replace them in advance instead of waiting until they can not be used anymore.
2. Which Factors Corrode Your Strings?
There are many elements influencing the longevity of your guitar strings. But in general, we can focus on these key reasons:
- Frequency of guitar usage – This is one of the most decisive factors that impact your strings. The more you use the guitar, the more wear and tear your strings get. Therefore, you should regularly restring your guitar if your frequency of usage is high.
- The quality of your strings – Simply put, the better your strings are, the longer time you will have to use them. As a whole, cheap guitars with low-quality strings will make you change the strings more often than an expensive guitar with high-quality strings.
- The maintenance of guitar strings – If you want to increase the longevity of your guitar strings, you should have good maintenance for it. Any hard touch or overuse of your guitar can badly affect the strings. Not only the guitar strings, everything in the world requires great care to maintain its condition. Therefore, maintenance is very necessary to protect your strings.
3. Instruction for Restringing A Guitar
There are loads of different gauge strings in proportion to different types of guitar. Therefore, it requires a basic understanding of them so you can choose correctly. In general, there are 3 main categories available on the market nowadays: Acoustic, Classical and Electric guitar. However, today we will just focus on the 2 most popular ones: Acoustic and Electric guitar. All in all, we will go through all the details of changing strings for these 2 types.
Before starting any installation, you should be sure that these below objects are available:
4. Initial Preparation
Remember to Prepare:
- 1 x New String set
- 1 x Pair of wire cutters
- 1 x String winder-optional
- 1 x Tuning machine-optional
- 1 x Soft cloth
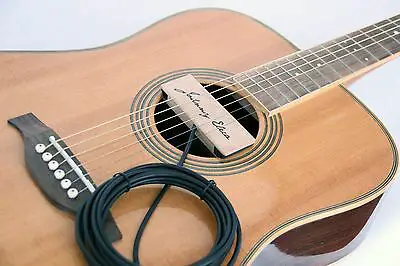
There are 6 strings in an acoustic guitar, which includes: 2 plain treble strings and 4 wound bass strings. It should be noted that you will have to change all these 6 strings at the same time when replacing the guitar string in order that you can get an even tone.
Step 1: Loosen the strings
You should turn the key in a clockwise direction to slacken the strings, and after releasing them you can remove or totally cut the string out. It is often argued that you should change the strings one by one to avoid damaging the neck since sudden changes in tension may flex the guitar’s neck. But in fact, this is not so important. You should only be careful if your guitar is equipped with an EQ (amplifiers) because under the guitar’s bridge that is fitted with EQ there will be quartz fibers to record the sound. Therefore, you should avoid taking the bridge out since that action can badly affect the sound of the guitar when being plugged into the speaker.
Step 2: Remove the bridge pins
The difference between an acoustic and a classical guitar is that the acoustic one uses an end pin to keep the strings fixed in place. You can use a plier or the built-in notch of the string-winder for removing each pin. If you have a rubber plier, that will be very good; otherwise, you can wrap a piece of paper under the plier to prevent the wooden surface of the guitar’s bridge from being scratched.
Tip: sometimes when you change the strings, you may come across some guitars that have such hard bridges that you can not withdraw the pins from them. To resolve this issue, you just need to put your fingers inside the keyboard to gently push the end of the pin while pulling it from the outside. Besides, you can also use a solid coin to press the string into the soundboard creating the force applied to the strings, which causes them to hit the latch. After the pin under the bridge bursts, you can easily pull the pin out of the bridge.
Step 3: Clean the guitar
After detaching the pins from the bridge, you can clean your guitar because this is a great opportunity for you to cast off all the dust which is normally hard to touch. You can use a small pad specialized for cleaning the guitar or just a soft cloth available in your home and then add a few drops of lemon oil on it to clean each part of the instrument. You should never use furniture polish, glass cleaner, or other common household cleaning liquid, otherwise, the wooden guitar’s surface will be destroyed. If you do need to use water, soak only a little water to moisten the cloth since too much water can damage the wood layer.
Step 4: Install the new strings
At this step, you will take your new strings out of the package, and unfurl them. In some good types, the strings will usually be pre-marked or pre-arranged in the right order so that you can easily follow and take the correct installation. You should be very careful in this step because if you locate the strings wrong, they will be easily broken when you adjust them. But the instruction does not always appear in the package. So what we should do in that case? There are many suggestions about the order of replacing the guitar strings. Some players are in the habit of changing the thin strings at the end first and then moving up to the upper strings, while some will start from the thicker strings above. The most common method is to start with the thinnest string first, and next is the thickest one. Then the second thinnest and the second thickest wire will be located in turn, and so on in order of 1, 6, 2, 5, 3, 4. Changing alternating strings in this way keeps the tension applied to the guitar’s neck from left to right more balanced and makes later tuning easier, especially on the old guitars.
Step 5: Insert the end of the strings into the hole and re-attach the pins
You should hold the string firmly during this time. It is noteworthy that you should fully stretch the string towards the head of the neck as the tension will prevent the pins from falling off.
Step 6: Reeve the strings through the tuning posts and stretch them
After the end of the string is held in the hole by the pins, stretch the strings towards the corresponding tuning posts and thread them through the posts. If the tuning posts are on opposite sides of each other on the headstock, you should pull the string through the gap between two posts and then pull it outwards.
You also need to hold the strings a little loose so that you can get extra strings wrapping around the tuning posts. Unless you do this, you will quickly run out of strings, which makes the strings slack during your performance.
Unfortunately, the procedure is different for each string, forcing you to try and learn from experience to get the most correct way for yourself.
Step 7: Tighten the strings
In this step, you will tighten the strings by turning the tuning keys anti-clockwise. When you are taking this step, you should arrange the new wraps to be on the bottom pushing the previous wrap upwards. This both makes the winds look tidier and increases the lifespan of the strings as well as ensures the high standardization of the pitch.
Similarly, you will tighten the remaining 5 strings with the order of 5A, 4D, 3G, 2B, 1E or from the thickest to the thinnest. To finish this step, you should stretch all the strings to make sure that they are set right. Your stretch of strings is very crucial because it will prevent your guitar from dropping the tuning and eliminate a great amount of time wasted retuning to break in the strings.
Step 8: Snip off any excess string
At the final step, you should take your wire cutters to cut off the excess string, leaving only about 1/8 inch (1/2 cm) of the excess. Cutting too short can cause the excess part to become entangled in the winds of string, which slackens your string.
Tip: You should only use this step with classical nylon strings. If it’s a steel-string guitar, skip it.
TO SUM UP
Replacing the new strings for your guitar can be said to be a common practice among guitar players. However, not everyone is skilled enough to change guitar strings by themselves. Actually, replacing the strings is not really a difficult task, but for new guitar players, it is not easy. However, no matter how difficult the installation is, this is an important skill that every guitar artist should know. With this article, we showed you detailed steps for restringing a guitar (both acoustic and electric guitar), hopefully, you will be able to change guitar strings by yourself without ever having to ask anyone to help you.
hen it comes to restringing a guitar, many players only consider it when the string is broken. Ironically, this problem tends to occur at the most inopportune of times like during your show on the stage. At that very moment, all the actions taken will be too late because they do not know how to re string the guitar promptly. Therefore, preparation is necessary. Regularly checking the guitar string to replace them timely is a must to protect your tone as well as your performance. To help you be well-prepared for replacing the guitar string, this guide today will give you the entire procedure step-by-step for a simple installation.